Photography
Photographing the Terracotta Warriors
The Terracotta Warriors are a photographer's dream — and a logistical nightmare. 8,000 soldiers in a cavernous pit, thousands of tourists, and strict rules about flash and tripods.
Written by Chen Yu
Photography & Practical Guides Writer · Xi'an since 2021
Chen Yu is a Xi'an-based photographer who has shot the Terracotta Warriors in every season and lighting condition since 2021. He handles all the practical infrastructure content — transportation, payments, SIM cards, visa guides — because he has personally test-run every route and setup process described on this site.
Here's how to get the shots after years of shooting there — the exact positions, settings, and timing that separate keepers from snapshots.
The #1 rule
Arrive at 8:30 AM when the museum opens. Be the first person into Pit 1. The morning light streaming through the roof windows creates golden beams across the warriors' faces. By 10 AM, the pit is packed shoulder-to-shoulder and the light is flat. This single decision determines whether you get National Geographic shots or tourist snapshots.
Pit-by-Pit Shooting Guide
Pit 1 — The Army (best shots)
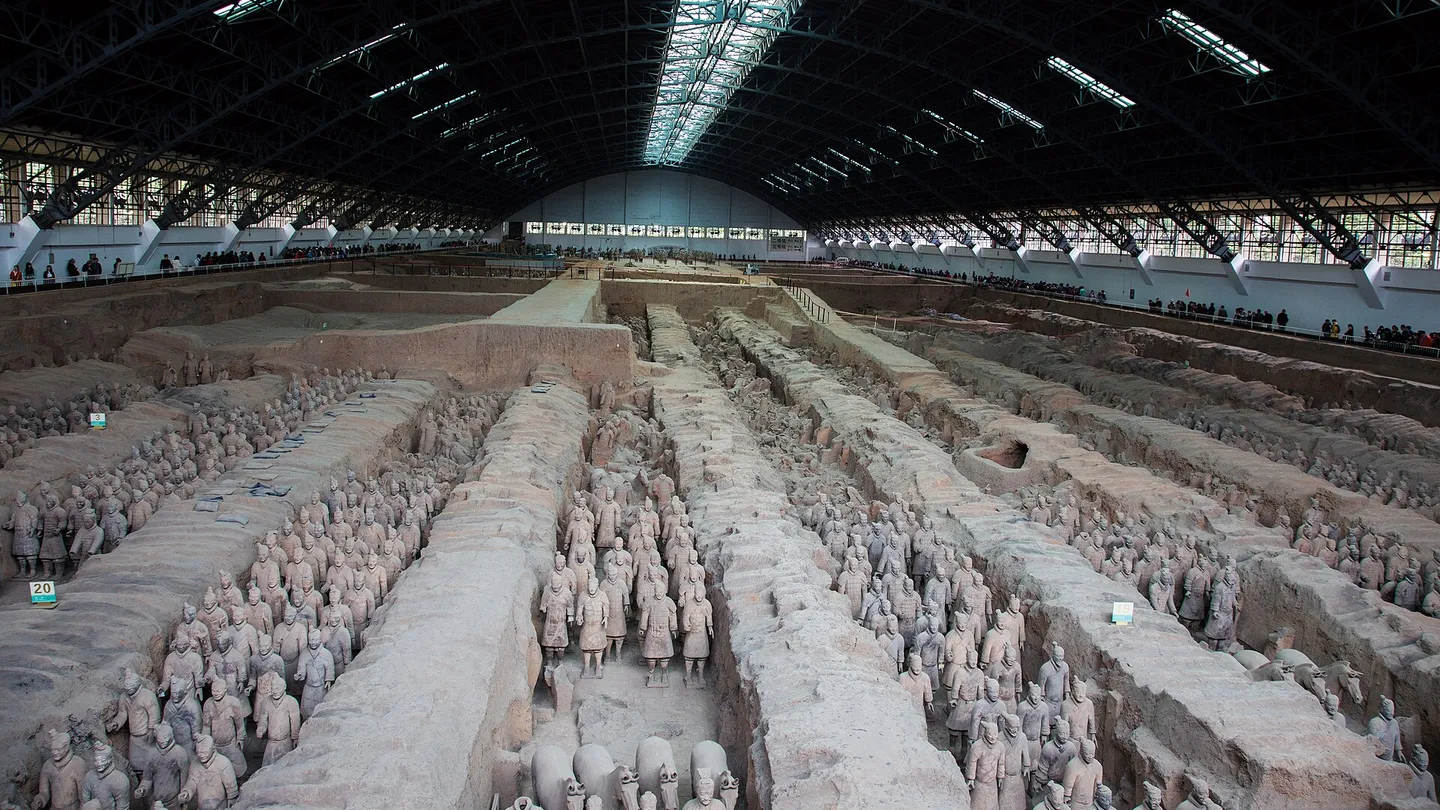
The largest pit with 2,000+ warriors in formation. This is the iconic shot. The key is position.
→Best position: Center of the viewing platform, leaning over the railing. Shoot downward at a 30° angle to capture the depth of the formation.
→Best lens: Wide-angle (16–35mm) for the full formation. Telephoto (70–200mm) for individual warrior details.
→Settings: ISO 800–1600 (it's dim inside), f/5.6–f/8 for sharpness across the formation, 1/60s minimum shutter speed.
→Pro tip: The restored warriors at the far end of the pit are the most photogenic — intact faces, original paint traces. Zoom in on them.
Pit 2 — The Details
Smaller but more varied — kneeling archers, cavalry horses, and generals with distinct facial features. This is where you get the character shots.
→Best position: Right side of the viewing area, where the kneeling archers are displayed. They face outward — you can get near-eye-level shots.
→Best lens: Telephoto (100–400mm). Each warrior has unique facial features — the detail is extraordinary.
→Pro tip: Look for warriors with traces of original paint — pink faces, red armor. They're scattered throughout the pit.
Pit 3 — The Command Post
The smallest pit, but the most atmospheric. High-ranking officers in a war room setting. The lighting here is the most dramatic.
→Best position: The corner closest to the entrance. The overhead light creates shadows that make the officers look imposing.
→Pro tip: This pit is often the least crowded. Take your time here.
Photography Rules
How to Avoid Crowds in Photos
My 90-Minute Shoot, From the Gate to the Edit
I've photographed the warriors in every season since 2021, and I've settled on a routine that consistently produces my best shots. Here's exactly how it goes, so you can copy it:
I'm at the entrance before opening, bag ready, lens on, white balance pre-set to daylight. The ticket scan is my starting gun — I walk (do not run) straight to Pit 1. Running is unnecessary and the guards will slow you anyway; a brisk walk puts you in the top ten.
Pit 1, first wave. I shoot the wide formation shots first — this is the only window where you can frame the full army without a single tourist in it. Center platform, leaning over, 30° downward angle. Then I move to the far end for the restored warriors with intact faces and paint traces.
Pit 2 for character portraits. The kneeling archers face outward, and with a 135mm lens I can isolate faces while the background falls away. I'm looking for paint traces — pink cheeks, red armor — which catch the light beautifully.
Pit 3, the command post. The dramatic overhead lighting makes the officers look imposing. This pit is the least crowded, so I slow down here and compose carefully.
A final pass through Pit 1's exterior courtyard for context shots — the modern building versus the ancient site, useful for storytelling sequences.
The key insight after five years: the first hour is 90% of the value. Everything after 9:30 AM is diminishing returns. If you arrive at 10 AM like most tour groups, you will fight crowds for every single frame.
Seasonal Light, Season by Season
Low golden sun angles through the roof windows create shafts of light across the warriors. October, in particular, produces warm, honey-toned light that needs almost no post-processing.
Brighter but harsher. High sun = more flat lighting. Shoot earlier (8:30 AM) and protect against heat haze over the viewing platforms. Morning is the only reliably good window.
Soft, diffuse light — less dramatic but very even. The interior stays dim, so push ISO to 1600-3200 and rely on the warriors' natural warmth rather than sunlight. Fewer tourists mean more time to compose.
Unexpectedly good. Overcast light is soft and flattering on the terracotta tones. The museum roofs keep you dry between pits. Bring a sleeve for your camera between buildings.
Smartphone Photographers: Don't Skip This
You do not need a full camera setup. I've seen outstanding phone shots from the warriors — here's what works:
→Use the 2x or 3x telephoto. The main wide lens captures too much crowd. The telephoto isolates warriors and compresses the formation.
→Tap to lock focus and pull exposure down slightly. The bright roof windows will overexpose the warriors if you let the phone meter on the sky. Drag the exposure slider down a third to half a stop.
→Shoot in bursts. Tourists move constantly. A 2-second burst guarantees at least one frame without someone's elbow in it.
→Clean your lens. The pits are dusty — a lens cloth is the single most important accessory, for phones and cameras alike.
→Charge before you arrive. You will shoot far more than you expect. A power bank saves the second half of your visit.
Recommended Gear
| Item | Why |
|---|---|
| Wide-angle lens (16–35mm) | Capture the full scale of Pit 1 |
| Telephoto lens (70–200mm) | Individual warrior details and face shots |
| Fast prime (35mm f/1.4–f/2) | Low-light performance for the dim interior |
| Lens cloth | Dust is common — clean your lens frequently |
| Extra batteries | You'll shoot more than expected — the pits are addictive |
FAQ
Can I take photos inside the Terracotta Warriors museum?
Yes, photography is allowed in all pits without flash. Tripods are not permitted inside the museum buildings. The best natural light in Pit 1 comes from the east windows between 8:30-10:30 AM, creating dramatic side-lighting on the warriors' faces.
What lens is best for photographing the warriors?
A 24-70mm zoom covers most situations. Wide angle (24-35mm) for the Pit 1 panorama, mid-range (50-70mm) for individual warrior details. A fast prime (35mm f/1.8) helps in the dimmer Pit 2 and 3 where lighting is limited.
How do I avoid crowds in my photos?
Arrive at 8:30 AM opening time. Pit 1 is nearly empty before 9:30 AM. Shoot from the far end looking back toward the entrance — fewer tourists in that frame. Afternoon after 3 PM is also quieter when tour groups have left.